
One of the greatest Halloween thrills is the magical experience of turning pumpkins into glorious Jack-O-Lanterns! From the selection of that perfect pumpkin to the finished product, there is much to consider!
The first thing to remember is that pumpkins grow on vines! Pumpkins grow while resting on the ground and the stem is not designed to support the pumpkin’s weight. A stemless pumpkin tells you the pumpkin has had a rough journey from the patch—that it is an older or has been overly handled. A pumpkin with a nice greenish stem is your best bet for picking a fresh pumpkin. Pumpkins that have sturdy, thick stems, are a strong indicator that the walls of the pumpkin will be thick. A thicker stemmed, heavier pumpkin is better for carving or sculpting. Keep a close eye out for pumpkins with bruises, cuts, soft spots, or tiny little creepy crawlies, as you would when picking out any type of produce. A pumpkin with blemishes often indicates that it is already starting to rot.

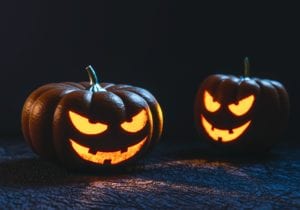
Pumpkins with sturdy stems are the best for carving!
You will know it when you see it!
Beauty is in the eye of the beholder and everyone has a different take on what makes a GREAT PUMPKIN! Part of the joy of pumpkin carving is that pumpkins come in so many amazing shapes and sizes. Often, a lighter color pumpkin will indicate a softer flesh that’s easier to carve in detail. A funky pumpkin can often be a dream when it comes time to create your Halloween masterpiece. Lumpy, bumpy, chunky, spotty or even a picture perfect bright orange beauty, when it comes to choosing a pumpkin, it is usually, love at first sight.
See the BIG Picture…
Once, you have chosen your pumpkin—the first thing you need is a vision of what you want your finished Jack-O-Lantern to look like! Do a rough sketch. Get some references. Have a plan! It doesn’t matter if you’re going for high art or something simple and fun, print or draw your design on paper first. Then lightly trace the design through the paper and onto the pumpkin with the tip of a knife. Stencils are also a great help in creating an initial design. For those who have a bold artistic flair, just sketch your design directly onto the pumpkin using a dry-erase or water-based marker. Once the design is finished, you are ready to start carving.
Something to consider before starting to carve!
You can buy your pumpkin whenever you want, most pumpkins last a really long time until you carve them. The best idea is to wait until you ready to display your pumpkin to start carving. A pumpkin a perishable food item and as soon as you cut into it, it begins to decompose. Pumpkins are very unpredictable—some last three weeks but then others three days. A good rule of thumb is to carve your pumpkin within two or three days of when you really want to display it. If you want a great Jack-O-Lantern for Halloween, you should really wait until that last week in October.
Selecting your carving tools!
When it comes to carving your pumpkin, you can use whatever it takes, including paring and serrated knives, lemon zesters, rasps, Exacto-knives, ribbon hoops, saws, and clay sculpting tools. If you have little children who are not old enough to use cutting tools, there is always the option to decorate using paints and markers. These pumpkins last longer and the kids still get the thrill of putting their own artistic stamp on their pumpkins.
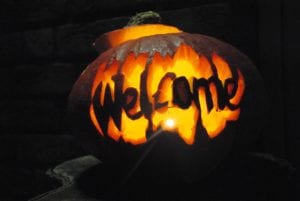
It’s always FUN to create a pumpkin masterpiece
A Great Debate! Pumpkin top on or Pumpkin top off!
While most of us choose to grab that big knife, and cut out the top of our pumpkins to scoop out the insides and begin our pumpkin’s transformation, many professional pumpkin carvers recommend leaving the pumpkin’s top intact. Removing the top will weaken the structural integrity of the pumpkin and it also cuts off the vine, which supplies the pumpkin with nutrients and moisture that allows it to live longer. Some professionals favor cutting a hole in the back of the pumpkin instead. The choice is yours!
It’s time to get MESSY!
There’s no getting around it: carving pumpkins is a really messy process, especially when it comes to scooping out the inside of the pumpkin. Don’t like all that sticky interior pumpkin goop and seeds, then grab some rubber gloves and prep your carving area to prevent excess carving mess. It is always a good idea to work with table coverings and a garbage can at the ready!
Now here’s the Big Scoop!
Use a big, sturdy scoop! An old-fashioned ice-cream scoop works great! Get ALL the mess out of your pumpkin. Never leave dangling bits of pumpkin goop inside your Jack-O-Lantern! Scoop and scoop thoroughly! Every bit of excess goop you leave inside your pumpkin will start to mold and then spread to the walls of your pumpkin. Scrape the walls really thin and get every last little stringy bit out and the walls of your pumpkin will be drier and stay that way longer before they start to break down. If you scrape the inside of the pumpkin completely to expose the light-colored flesh, you will find it reflects more light. And if you are hungry for more Halloween fun, don’t just throw away those gooey guts and slimy seeds! You can rinse those seeds, season and toast them on a baking sheet to create a yummy snack.
Once you are done carving, here are two more tips you might find useful!
When putting your pumpkins out for public display indoors or outdoors it is best to light your masterpieces with LEDs or CFLs. Dancing candlelight may be pretty, but it is dangerous and can lead to fires. LEDs and CFLs are really bright, but they don’t emit any heat, making them perfect for displaying pumpkins. It’s important to keep your pumpkin as cool as possible, and if you have a heat source inside of it, the pumpkin will start to cook on the inside. Which may smell nice, but severely decreases the lifespan of your Jack-O-Lantern. And finally, if your beloved pumpkin endures the rigors of All Hallows Eve and you feel like bringing it inside, you can sprinkle its insides with cinnamon, nutmeg and cloves and then your Jack-O-Lantern can double as a fun Fall air freshener.
Come to iPlay America to experience ULTIMATE Halloween FUN!
Want to Make pumpkin decorating even more FUN?
As part of iPlay America’s ULTIMATE Halloween FUN, guests can visit our outdoor Pumpkin Patch! It’s great fun for everyone and when guests purchase a Pumpkin Patch admission for just $5 per person, they get to choose their own pumpkins to decorate from our Decorating Station! Don’t forget to check out all the other FUN activities in our Halloween Tent, too! Open every Saturday and Sunday from NOON to 4:45 PM, the Pumpkin Patch is a family favorite. So, remember when you bring the family to iPlay America this October, to carve out some extra time to decorate pumpkins with your favorite punkins!